A pixie bob sits right between two cuts: a short tapered nape like a pixie, and a front that drops to about the earlobe like a bob. It needs a trim every four to six weeks to keep the graduation clean, and most mornings it’s a few minutes with a small round brush.
1. Pixie Bob in Its Classic Shape
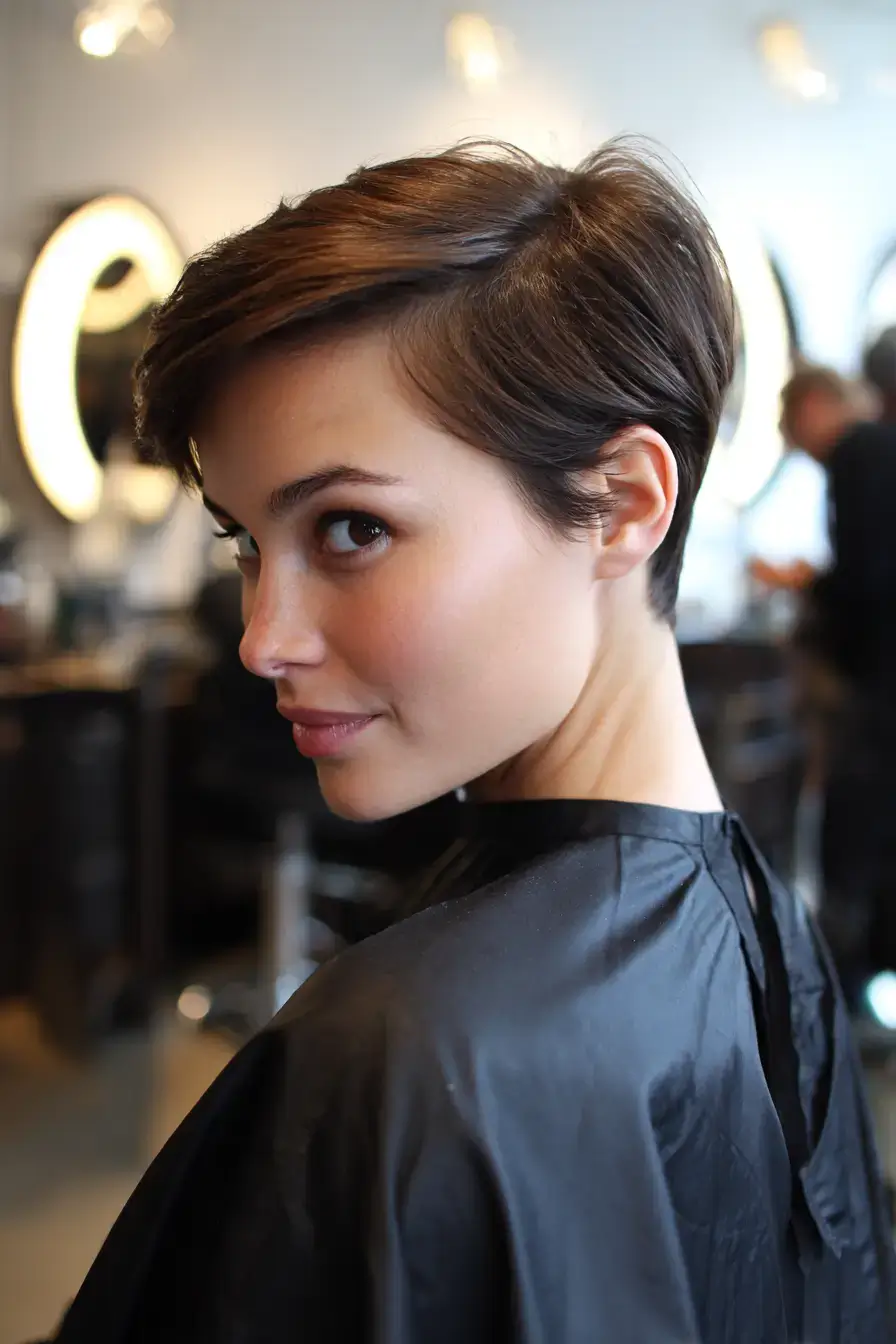
I clipper-over-comb the nape on dry hair, graduate up to the occipital, and angle the front down to the earlobe. That gives the classic pixie bob its place between a pixie and a bob: short tapered nape, front at the earlobe. Fine to thick density and 1A to 2A texture work best on oval and heart faces. Dry it with a small round brush, rolling the front under. Trim every five weeks.
2. Pixie Bob Haircut Finished With Side Swept Bangs
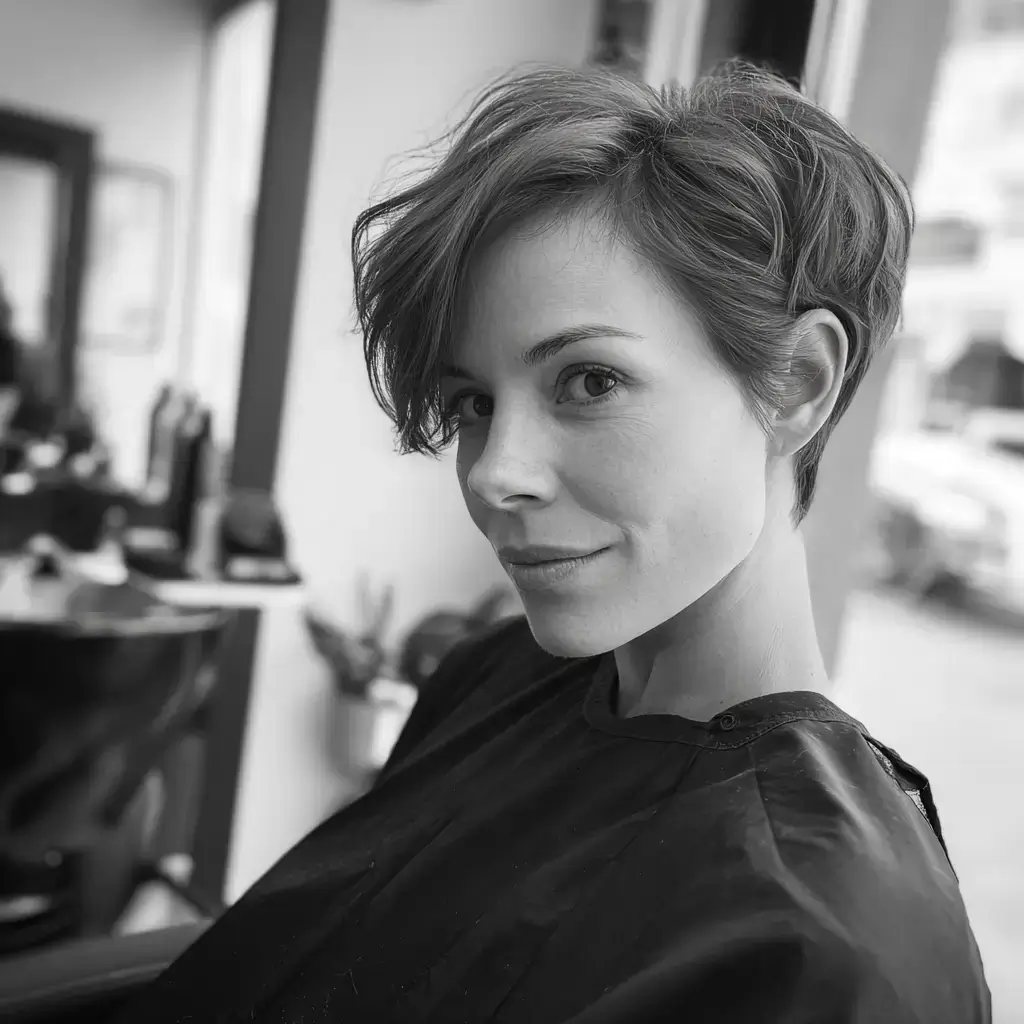
I taper the nape dry, graduate to the occipital, take the front to the earlobe at an angle, and cut the bangs from the part to the cheekbone. On a pixie bob haircut with side swept bangs, the front length carries straight into a fringe at the cheekbone. Fine to medium density with 1A to 2A texture is the match on round or square faces. Use a flat brush to dry the bangs across. Trim every five weeks.
3. Pixie Bob Cut for Fine Hair
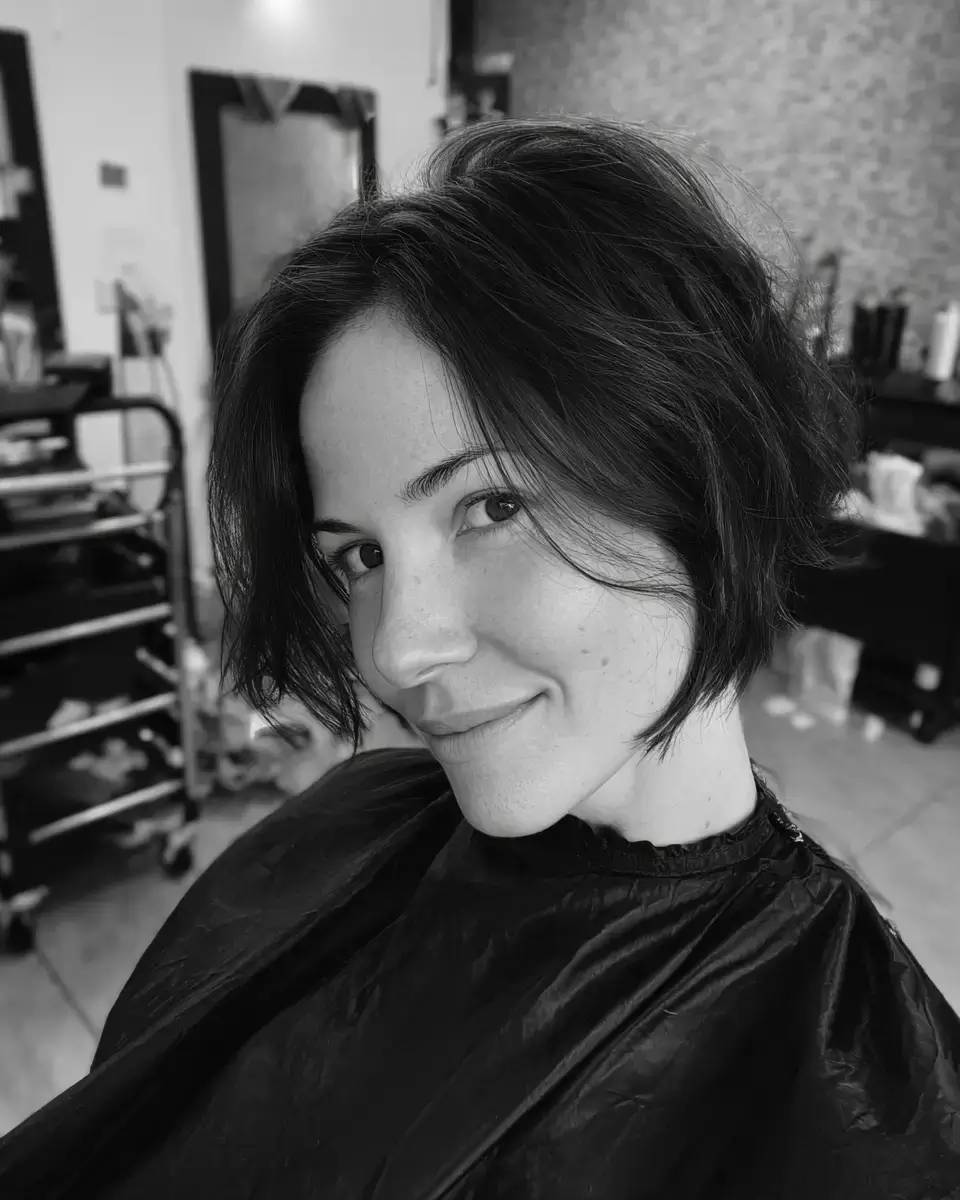
I scissor cut the nape on dry hair instead of using clippers, graduate gently, then cut the front at the earlobe holding the shears flat. Keeping that front blunt lets a pixie bob on fine hair look thick at the ends. It’s meant for fine density and 1A to 2A texture on oval and round faces. Put mousse at the damp roots and lift the crown with a round brush as you dry. Trim every five weeks.
4. Pixie Bob With a Stacked Back
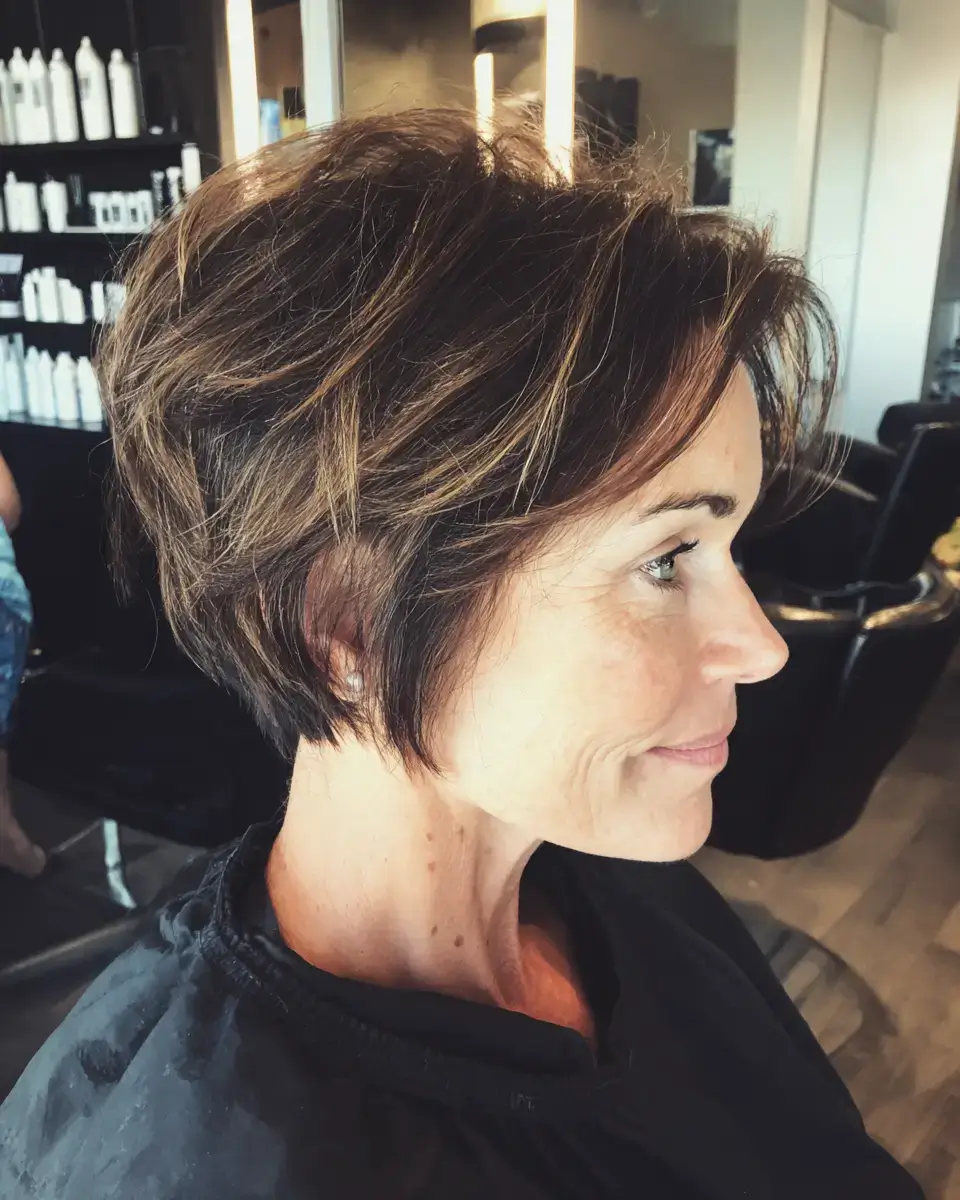
I taper the dry nape, build the graduation in half-inch increments up to the crown, and angle the front downward. A stacked pixie bob piles that graduation at the back so the nape lifts and the front stays at the earlobe. Fine to medium density and 1A to 2A texture suit round and oval faces. Dry the stack up with a small round brush and turn the front under. Trim every four weeks.
5. Pixie Bob Haircut Built for Thick Hair

I clipper the dry nape, graduate to the occipital, angle the front to the earlobe, and point cut internal layers beneath the weight line. A pixie bob haircut on thick hair needs those layers or the back juts out like a shelf. It handles thick density and 1A to 2B texture on any face shape. Smooth in a cream and dry it flat with a paddle brush. Trim every five weeks.
6. Over-50 Pixie Bob
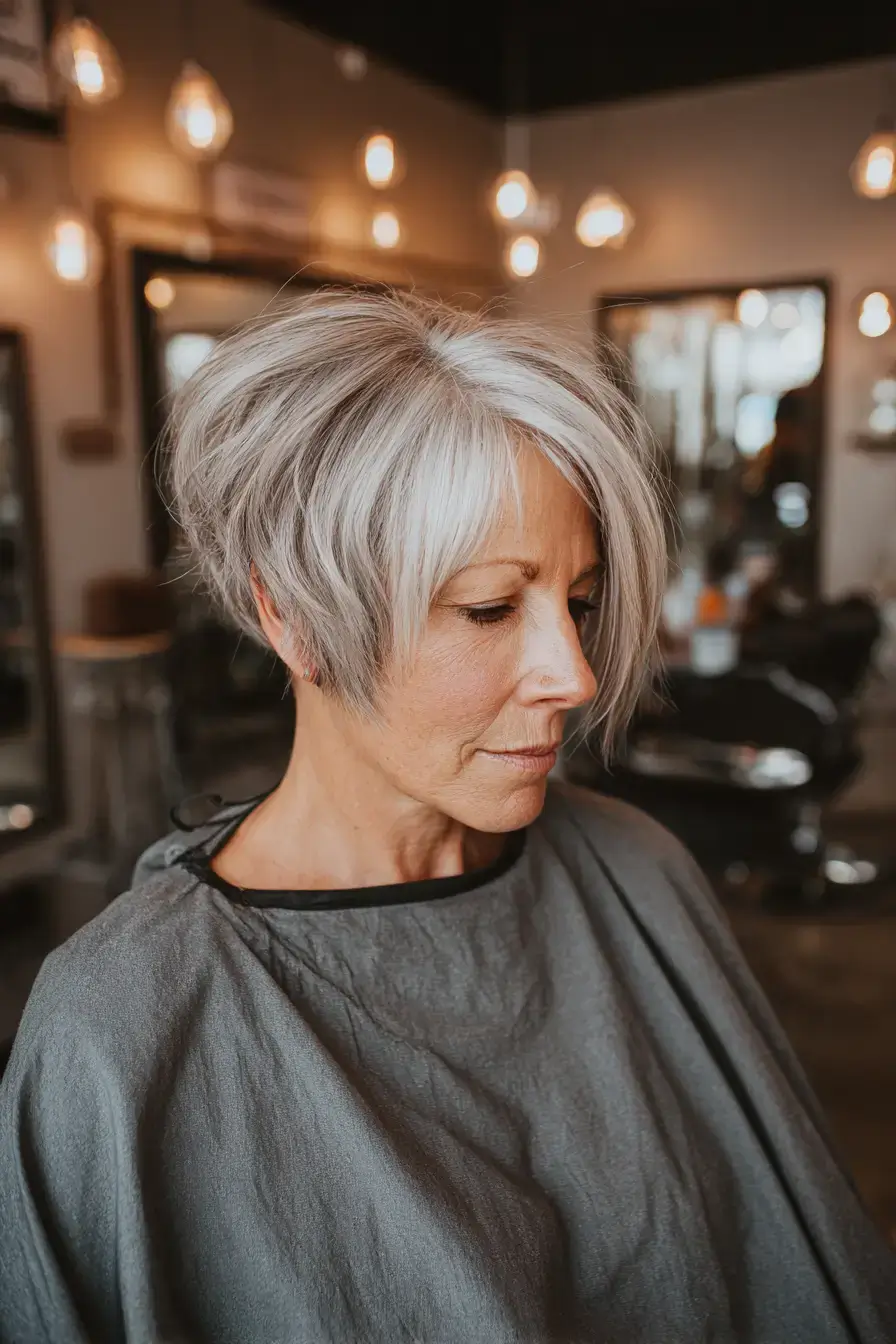
I scissor cut the nape dry, graduate gently, angle the front down, and cut a fringe to the cheekbone. The pixie bob over 50 keeps that soft nape, the front at the earlobe, and a side swept fringe that covers the forehead. Fine to medium density in 1A to 2A texture wears it on most face shapes. Dry it with volumizing mousse and a round brush. Trim every five weeks.
7. Pixie Bob With Soft Waves
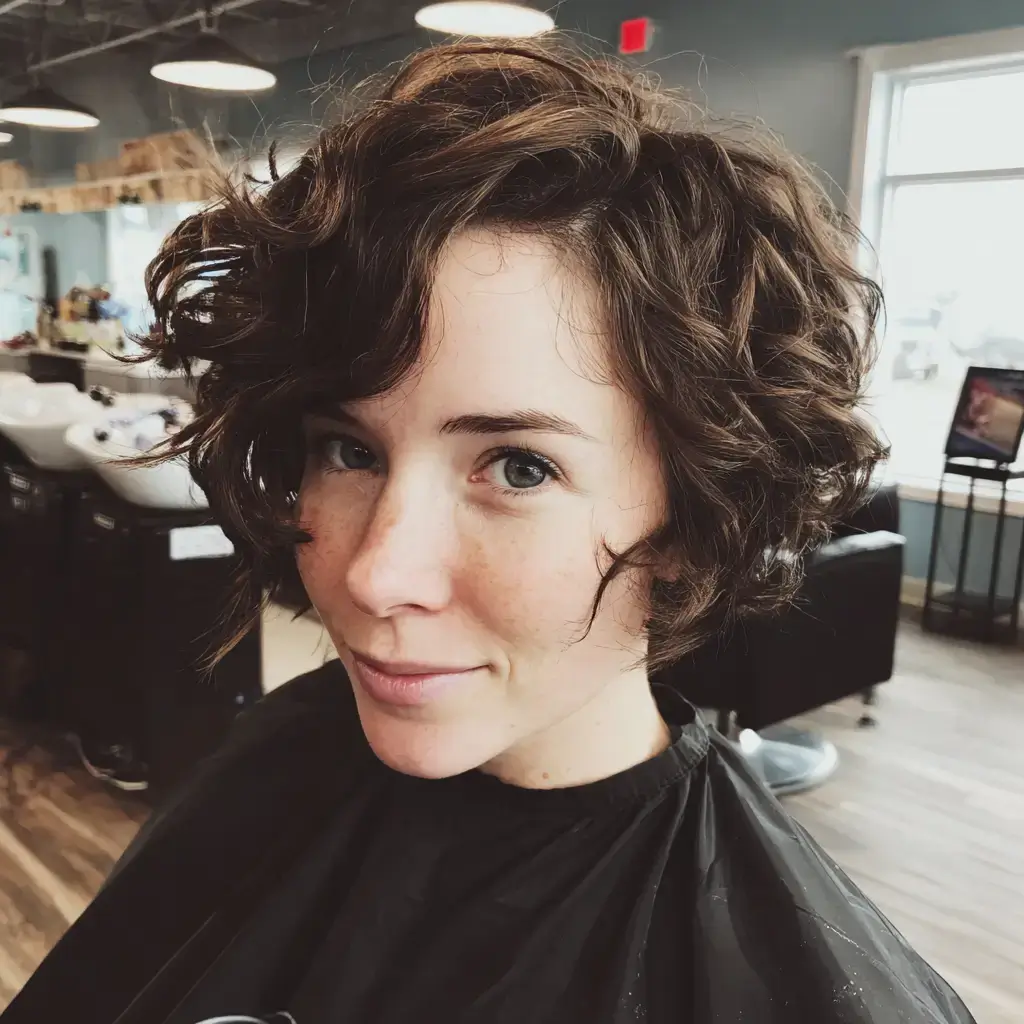
I taper the dry nape, graduate to the occipital, bring the front down to the earlobe, and point cut the ends. In a wavy pixie bob the front pieces bend, so the shape looks softer than a straight blowout. Medium density with 1C to 2B texture fits oval and heart faces. Work sea salt spray into damp hair, rough-dry, and twist the front pieces with paste. Trim every six weeks.
8. Pixie Bob Finished With Curtain Bangs
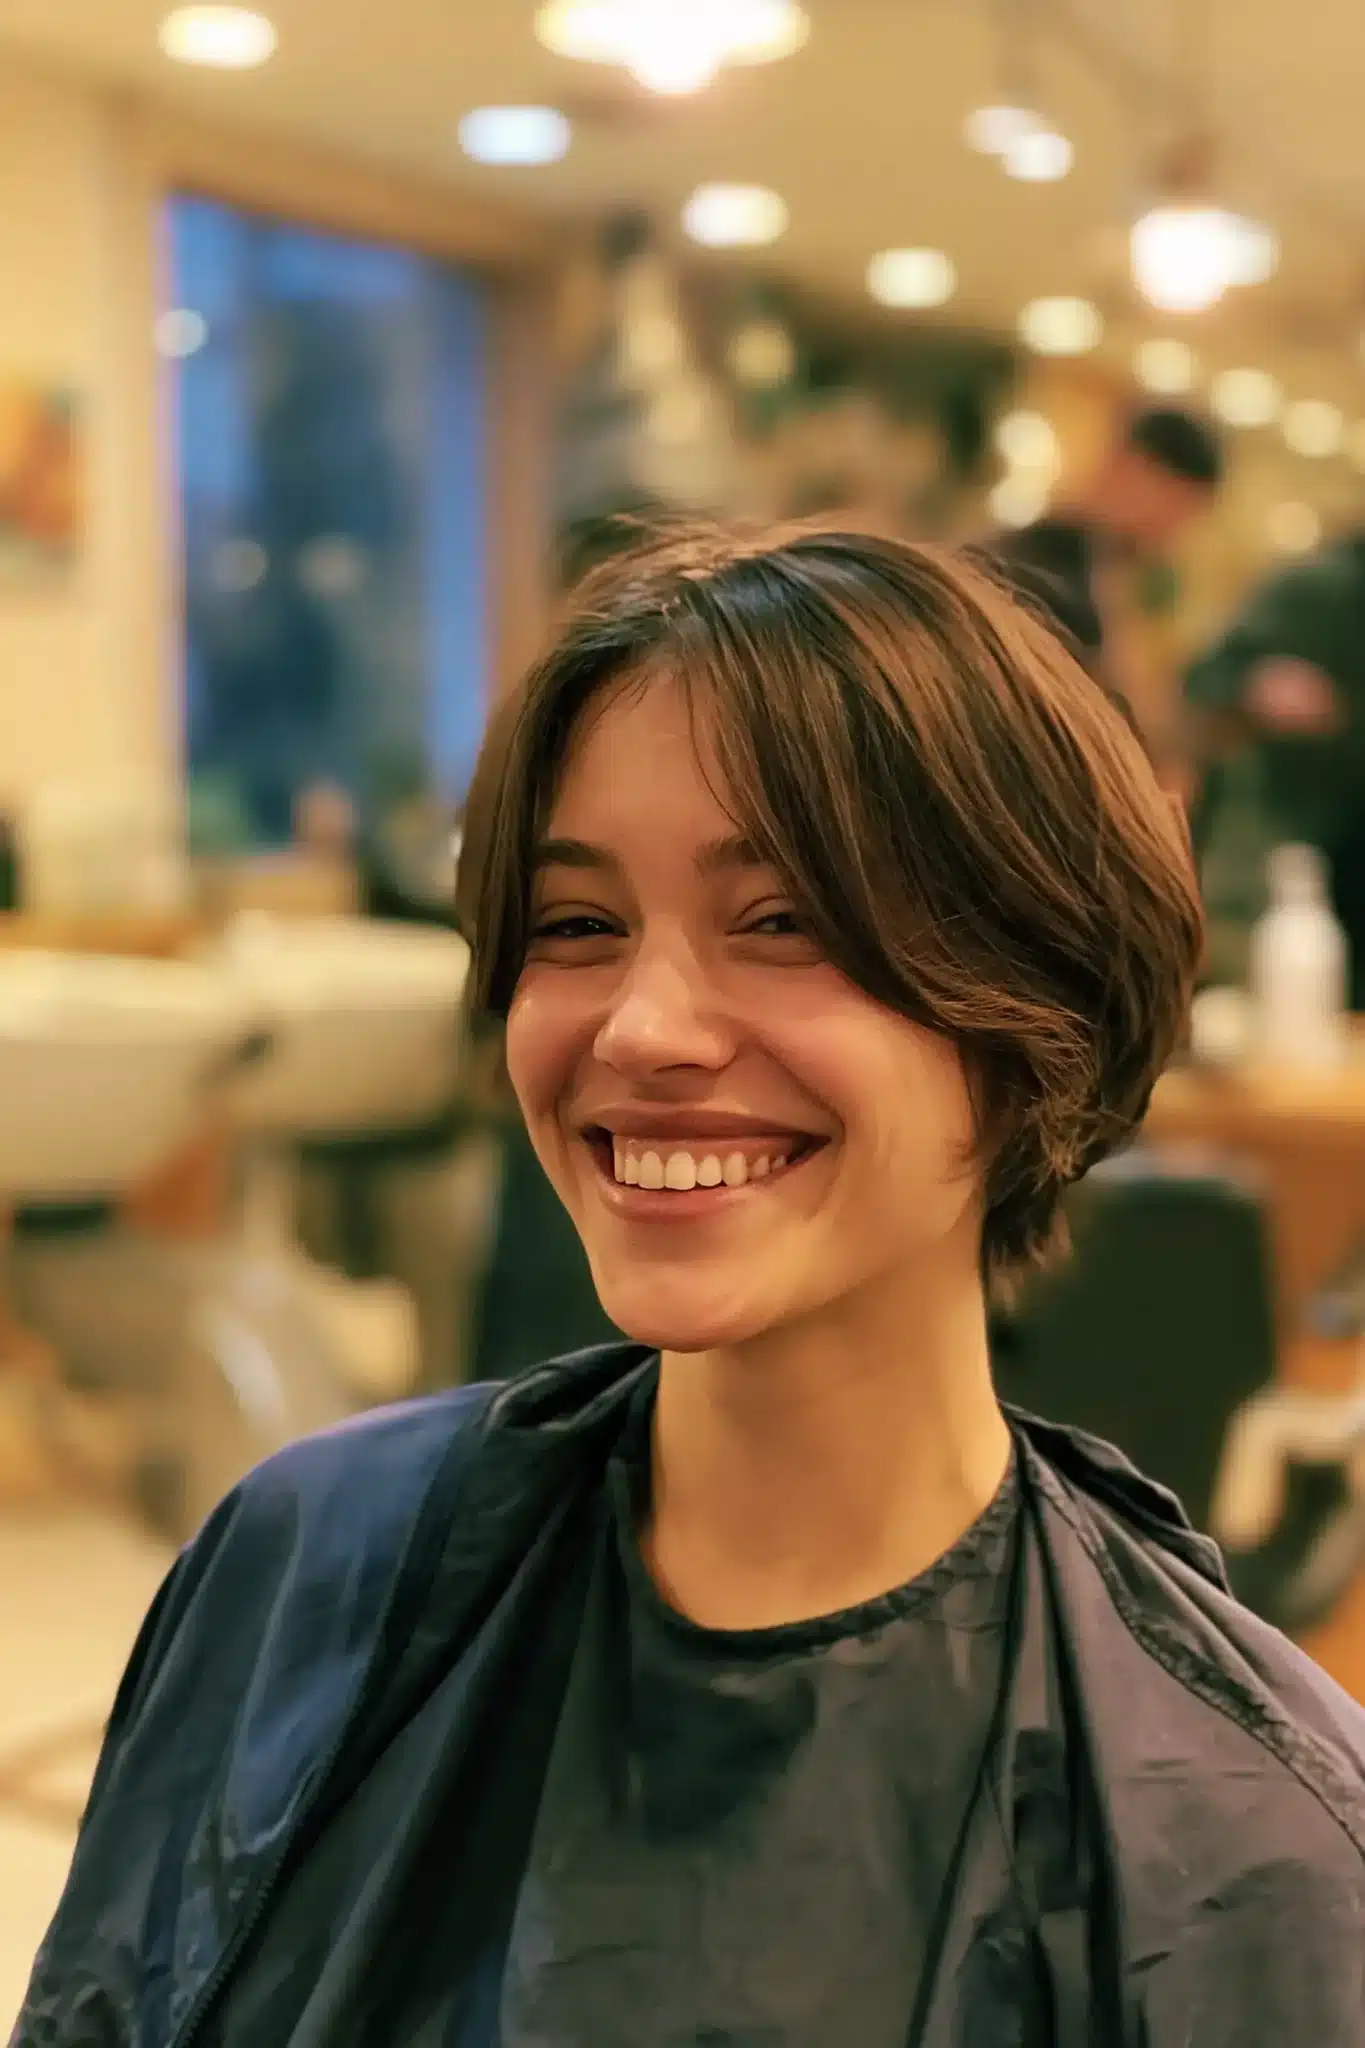
I taper the nape on dry hair, graduate to the occipital, angle the front to the earlobe, and cut the bangs from brow to cheekbone. Curtain bangs on a pixie bob part at the center and drop to the cheekbone on each side. Fine to medium density and 1A to 2B texture suit round and square faces. Dry the bangs outward with a small round brush. Bangs need a trim every five weeks.
9. Pixie Bob With Piecey Texture

I clipper the dry nape, graduate to the occipital, angle the front to the earlobe, then point cut an inch up into the ends. Point cutting that deep is what makes a textured pixie bob separate into pieces. Medium to thick density and 1A to 2B texture work on oval or square faces. Rough-dry with texture spray, then piece the ends using paste. Trim every five weeks.
10. Pixie Bob Shaped for Round Faces
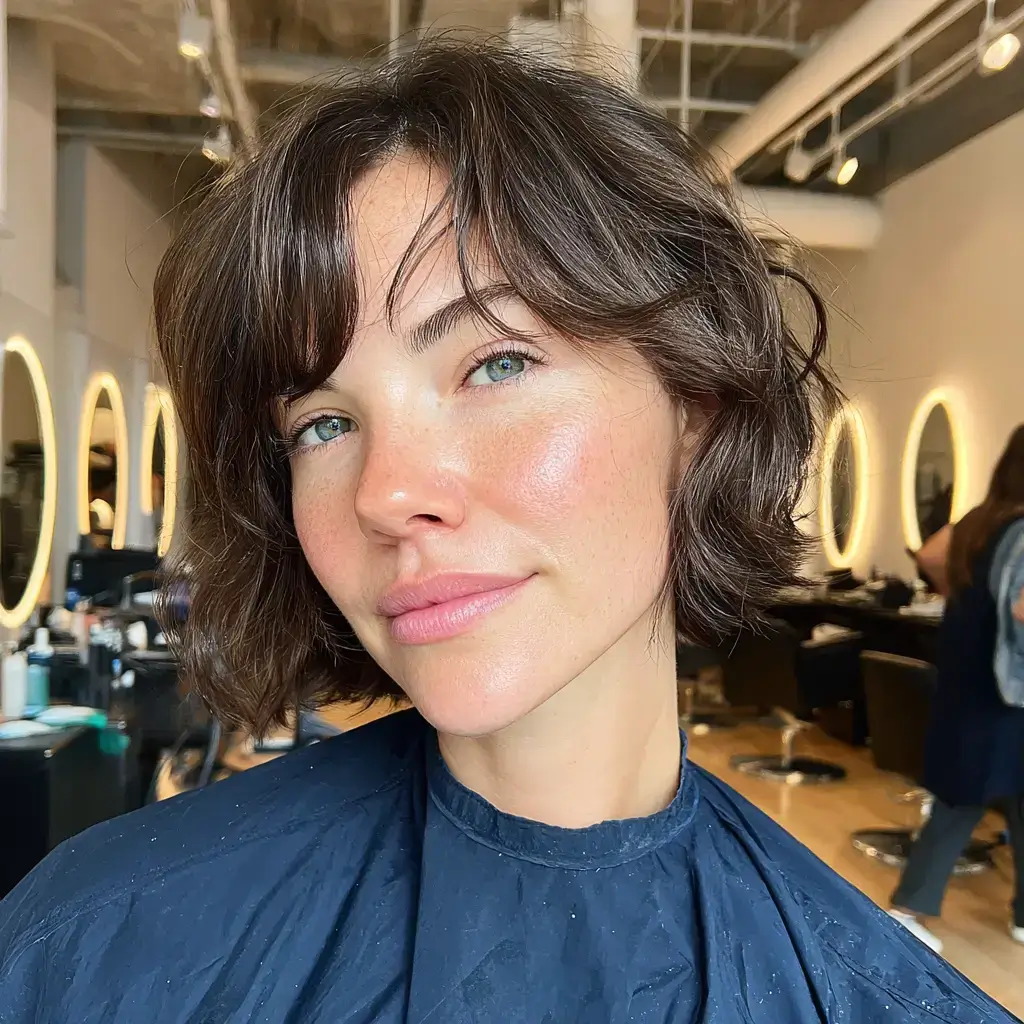
I taper the nape tight on dry hair, graduate high, and angle the front down to the jaw. On a round face, a pixie bob needs that crown height and a jaw-length front so the shape looks longer. Fine to thick density and 1A to 2B texture suit it. Lift the crown with a round brush and dry the front smooth and down. Trim every five weeks.
11. Pixie Bob Worn Sleek
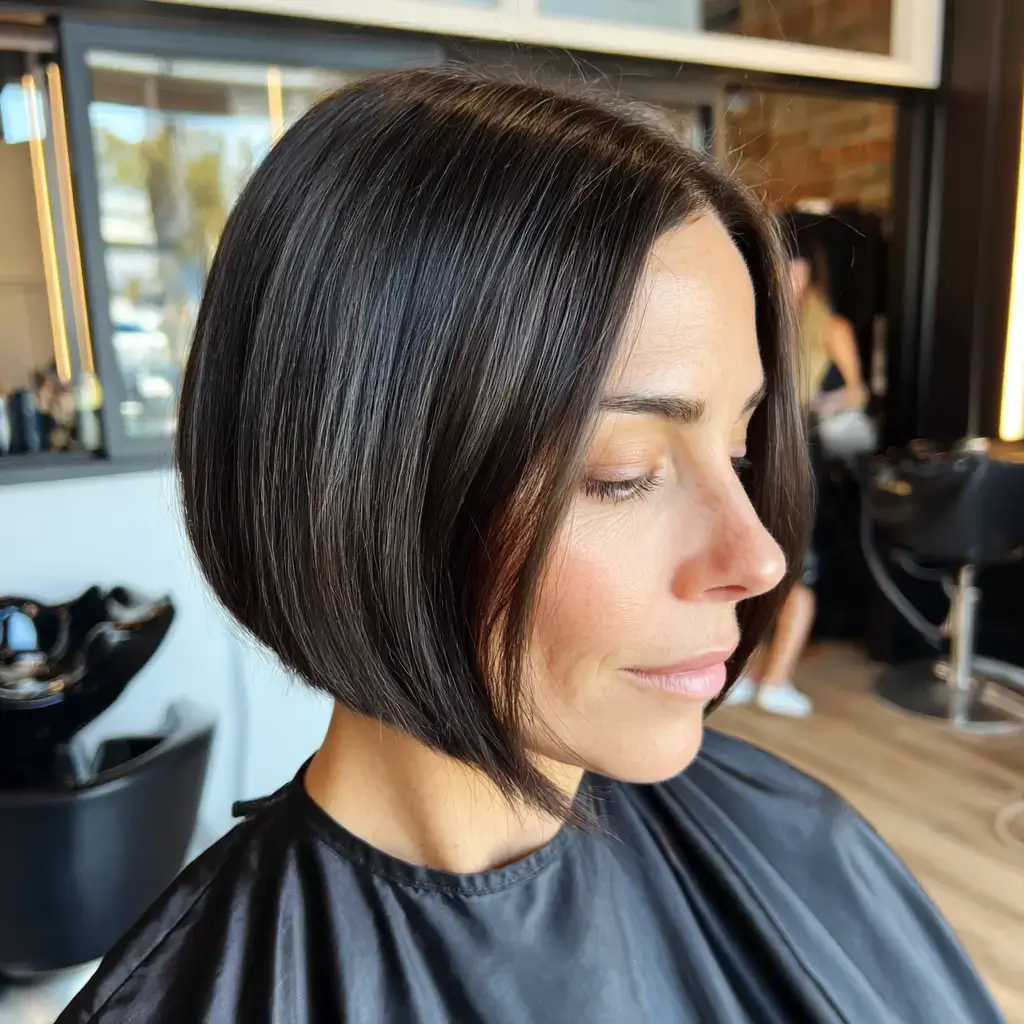
I clipper the dry nape, graduate to the occipital, and angle the front to the earlobe with flat shears. A sleek pixie bob shows all that graduation as one smooth curve from nape to front. Fine to thick density in 1A to 1C texture fits oval and square faces. Dry it flat with a paddle brush, smooth it with a flat iron, and finish with serum. Trim every five weeks.
12. Over-60 Pixie Bob
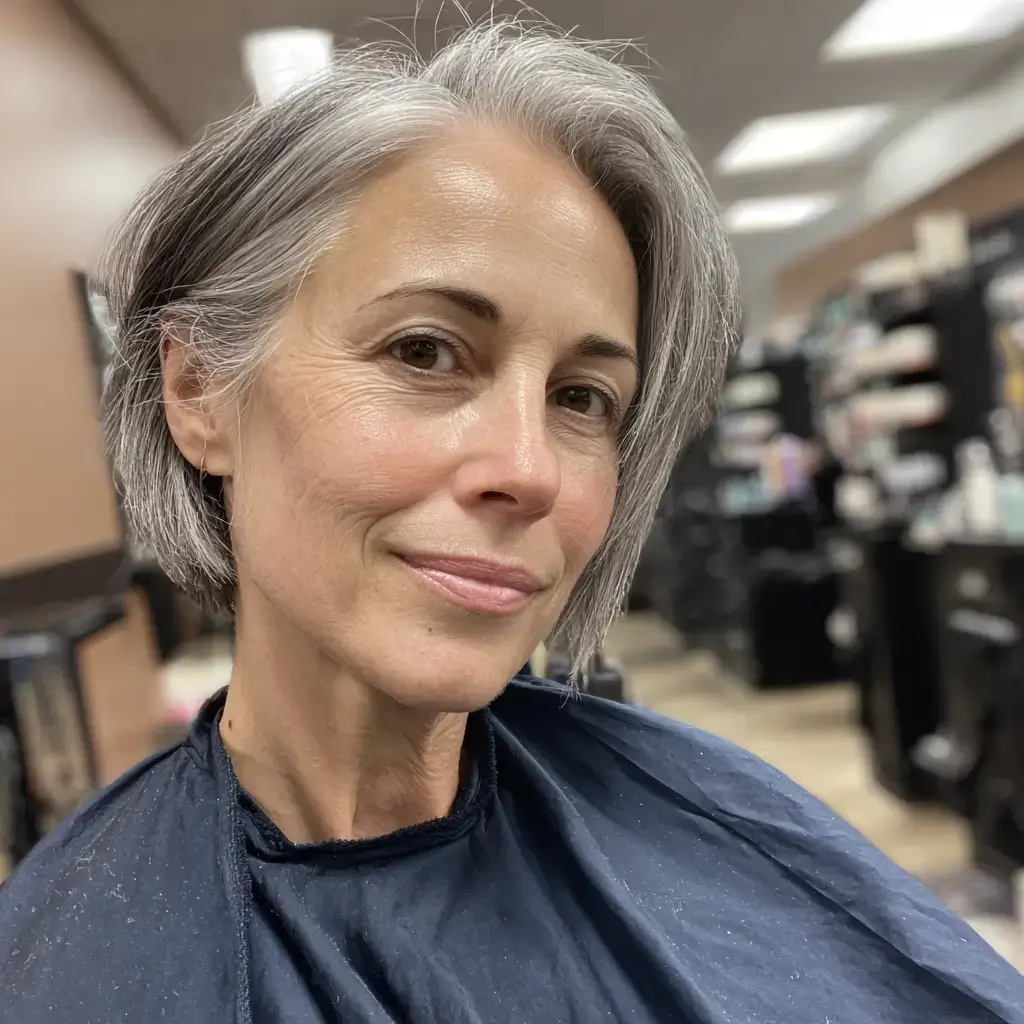
I scissor cut the nape on dry hair, graduate in wide increments, and angle the front down. For the pixie bob over 60, the graduation stays soft, the front sits at the earlobe, and the ends are point cut to keep them thick. Any face shape works with fine to medium density and 1A to 2A texture. Put mousse at the roots and dry with a small round brush. Trim every five weeks; gloss every eight.
13. Pixie Bob With Natural Curls
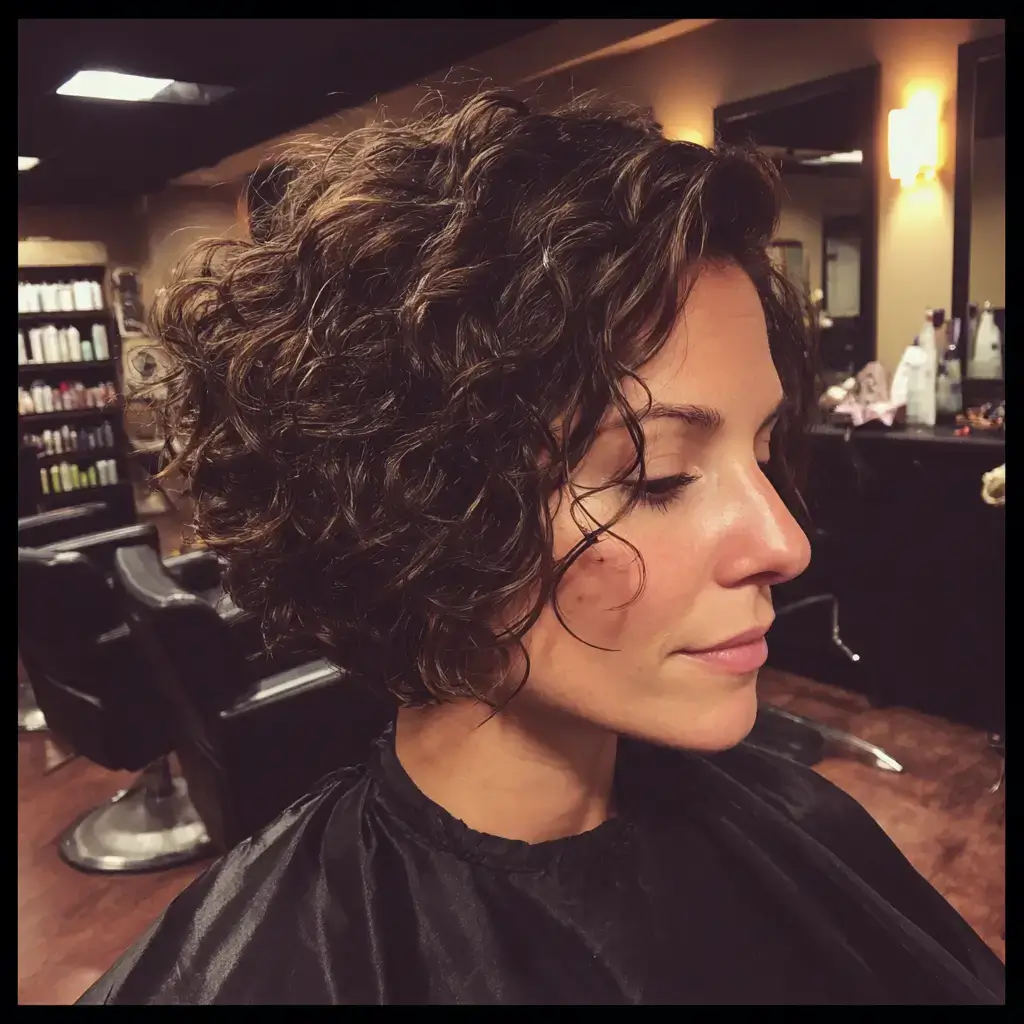
I cut the nape one curl at a time on dry hair, graduate to the occipital, and leave the front at the earlobe. Cutting a curly pixie bob dry, curl by curl, keeps the graduation visible once the curl springs up. Medium to thick density with 3A to 3C texture suits oval and heart faces. Work curl cream through wet hair with your fingers and diffuse on low. Trim every eight weeks.
14. Pixie Bob Haircut Lit With a Money Piece

I taper the dry nape, graduate to the occipital, angle the front to the earlobe, then lift the two front sections to a level nine and tone them beige. That money piece brightens the front of the pixie bob haircut where it frames the face. Fine to medium density in 1A to 2B texture is the fit. Dry the front forward using a round brush. Refresh every ten weeks.
15. Pixie Bob Under a Blunt Fringe
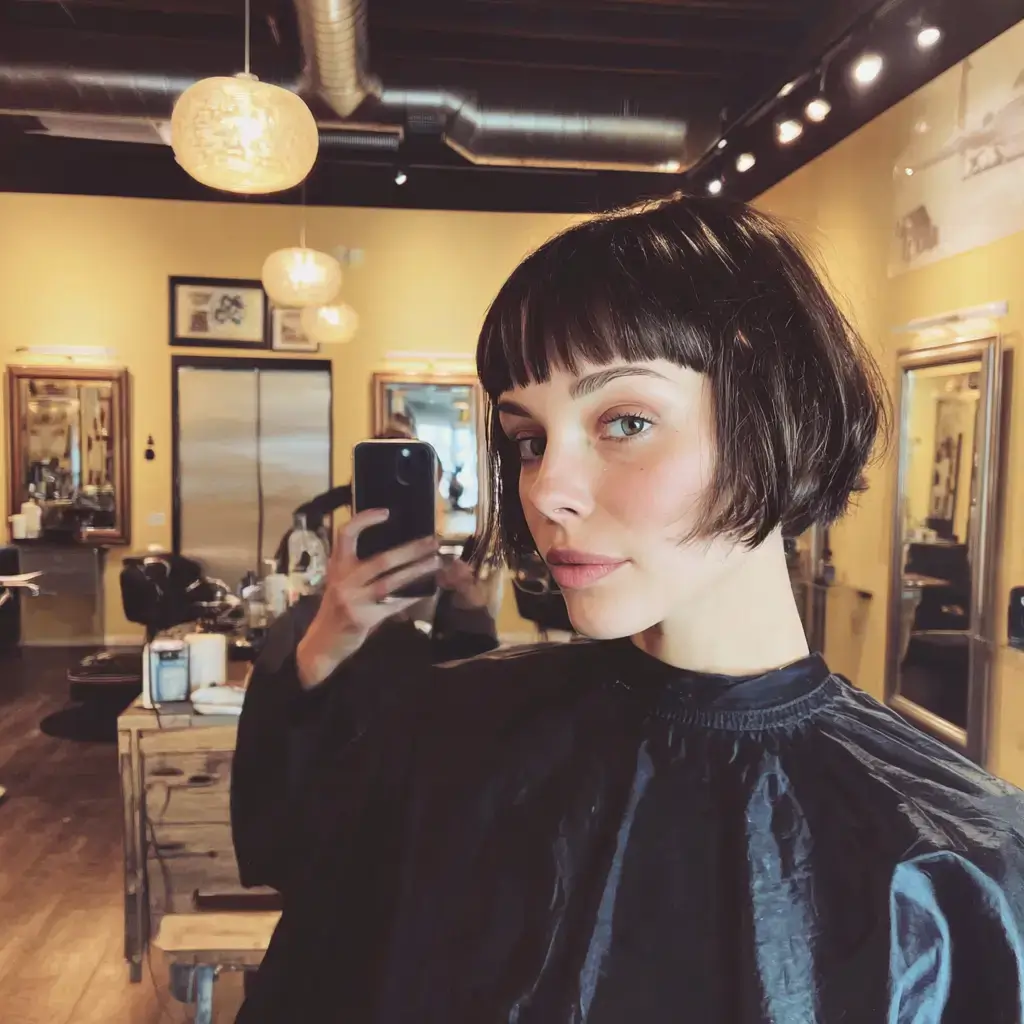
I clipper the dry nape, graduate to the occipital, angle the front to the earlobe, and cut the fringe straight at the brow with flat shears. That blunt fringe lays a straight line at the brow against the graduated back of the pixie bob. Fine to medium density with 1A to 1C texture fits oval and oblong faces. Dry the fringe down using a flat brush. Trim the fringe every four weeks.
16. Pixie Bob in Copper
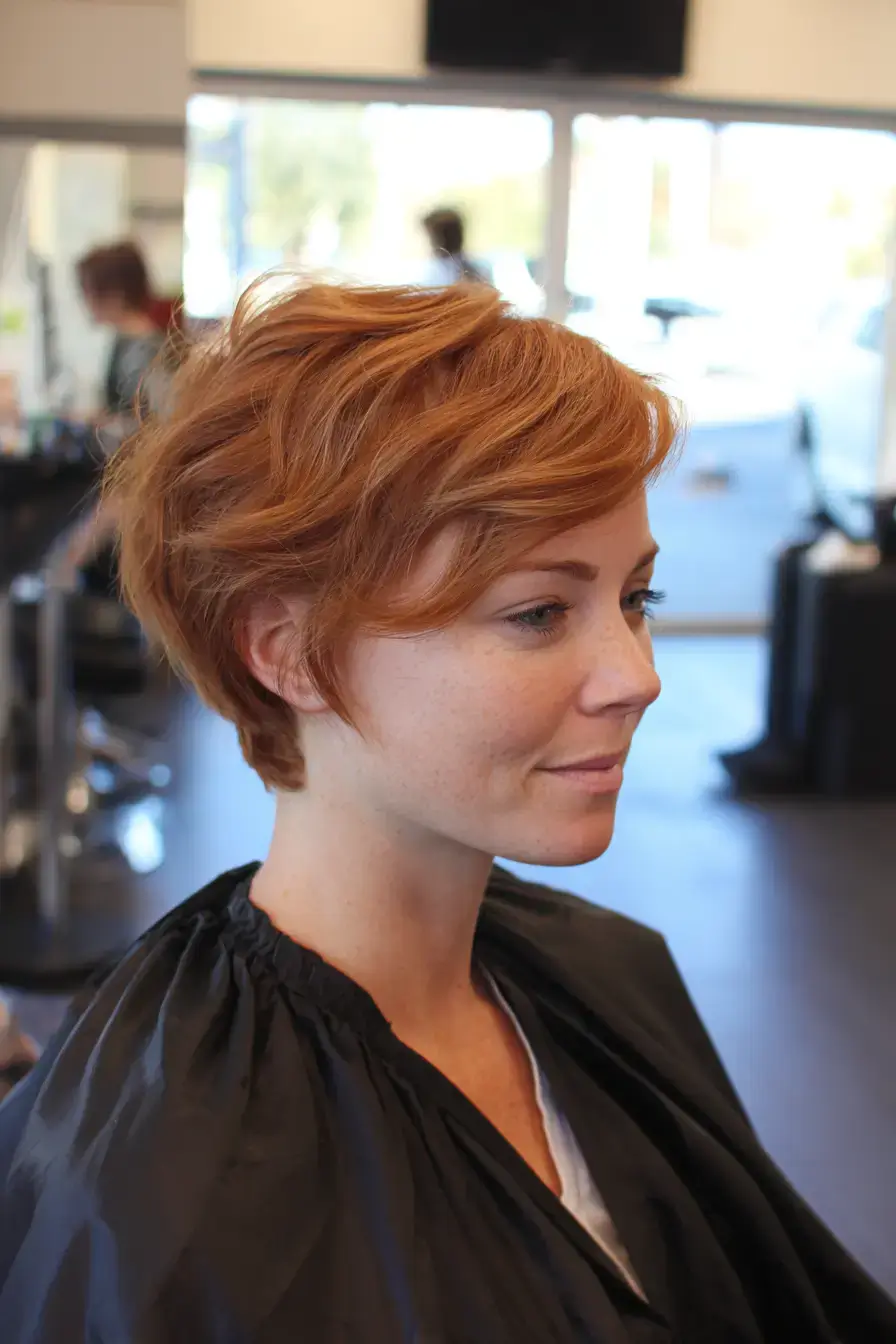
I taper the dry nape, graduate to the occipital, angle the front to the earlobe, and apply a level seven copper at the root with a demi on the ends. Copper on a pixie bob looks bright along the curve of the graduation. It suits warm skin tones and fine to medium density. Dry it with a round brush and finish with serum. Trim every five weeks; refresh the tone every five.
17. Pixie Bob Painted With Balayage
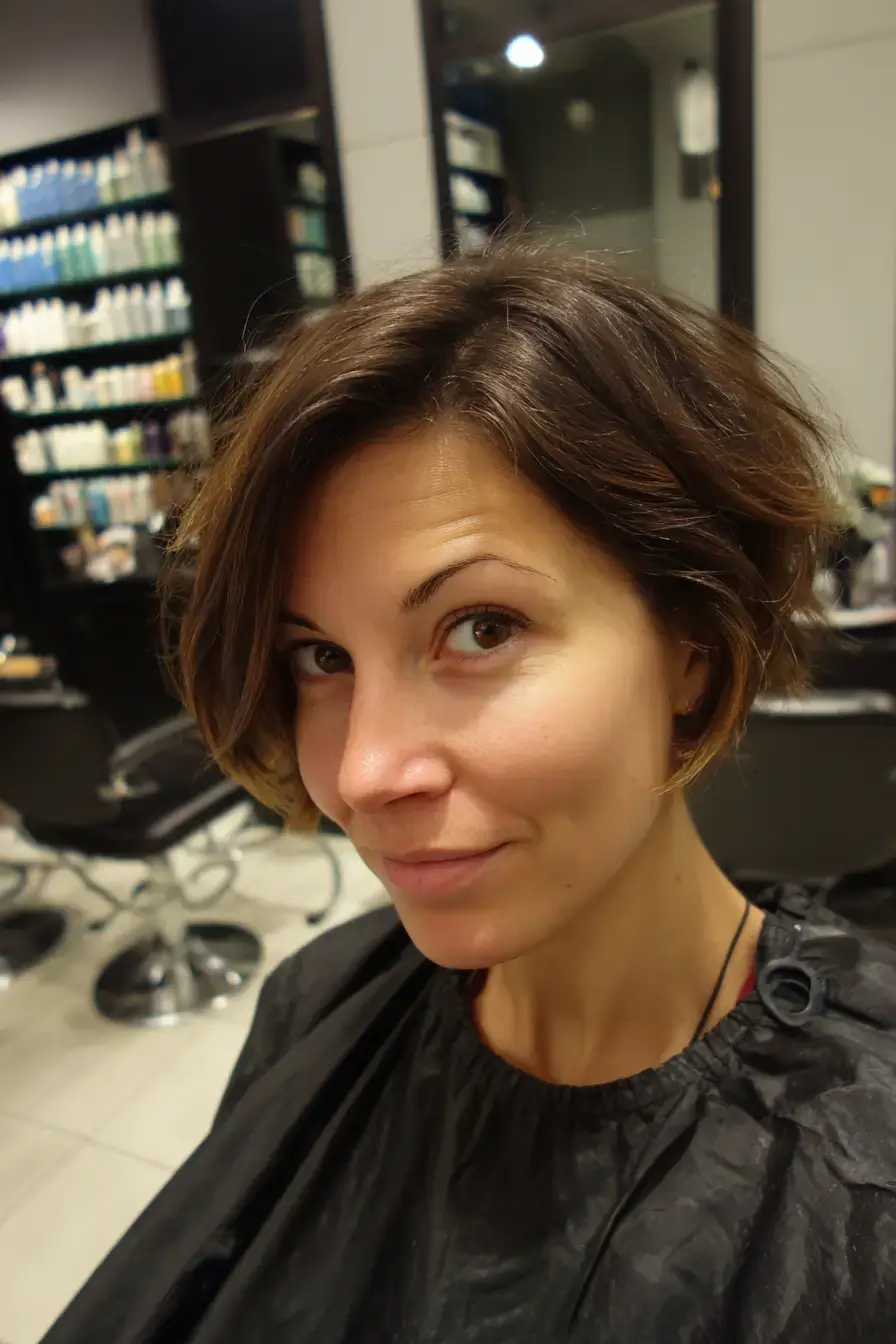
I taper the dry nape, graduate to the occipital, angle the front to the earlobe, then hand paint the front to a level nine. Keeping the balayage on the front pieces of the pixie bob leaves the short back dark. Fine to thick density and 1A to 2B texture both work. Dry the front forward with a round brush and add serum to finish. Refresh every twelve weeks.
18. Pixie Bob Haircut Shaped for Square Faces
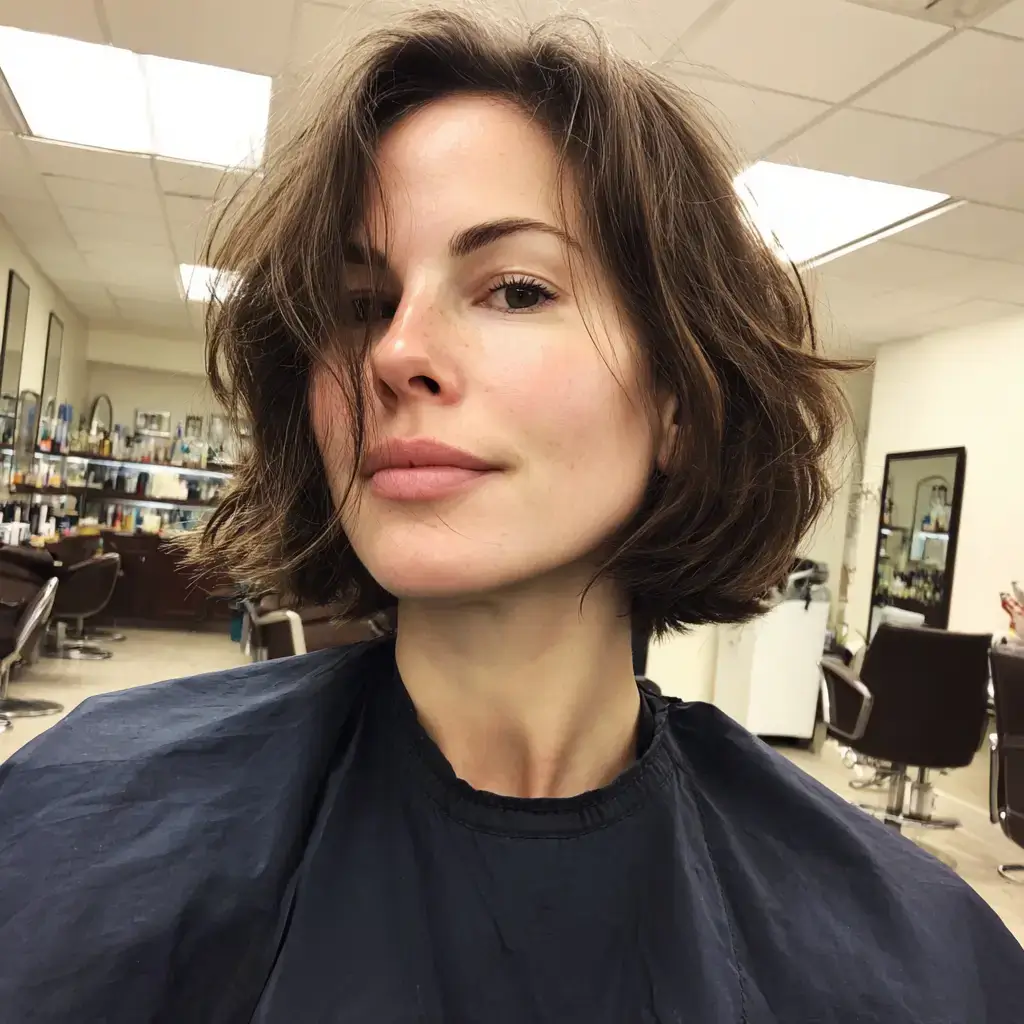
I taper the dry nape, graduate to the occipital, angle the front an inch below the jaw, and point cut the face frame. On a square face, a pixie bob haircut drops the front below the jaw and softens the corners with that framing. Fine to thick density and 1A to 2B texture suit it. Dry it with a round brush, turning the front under. Trim every five weeks.
19. Blonde Pixie Bob With a Shadow Root
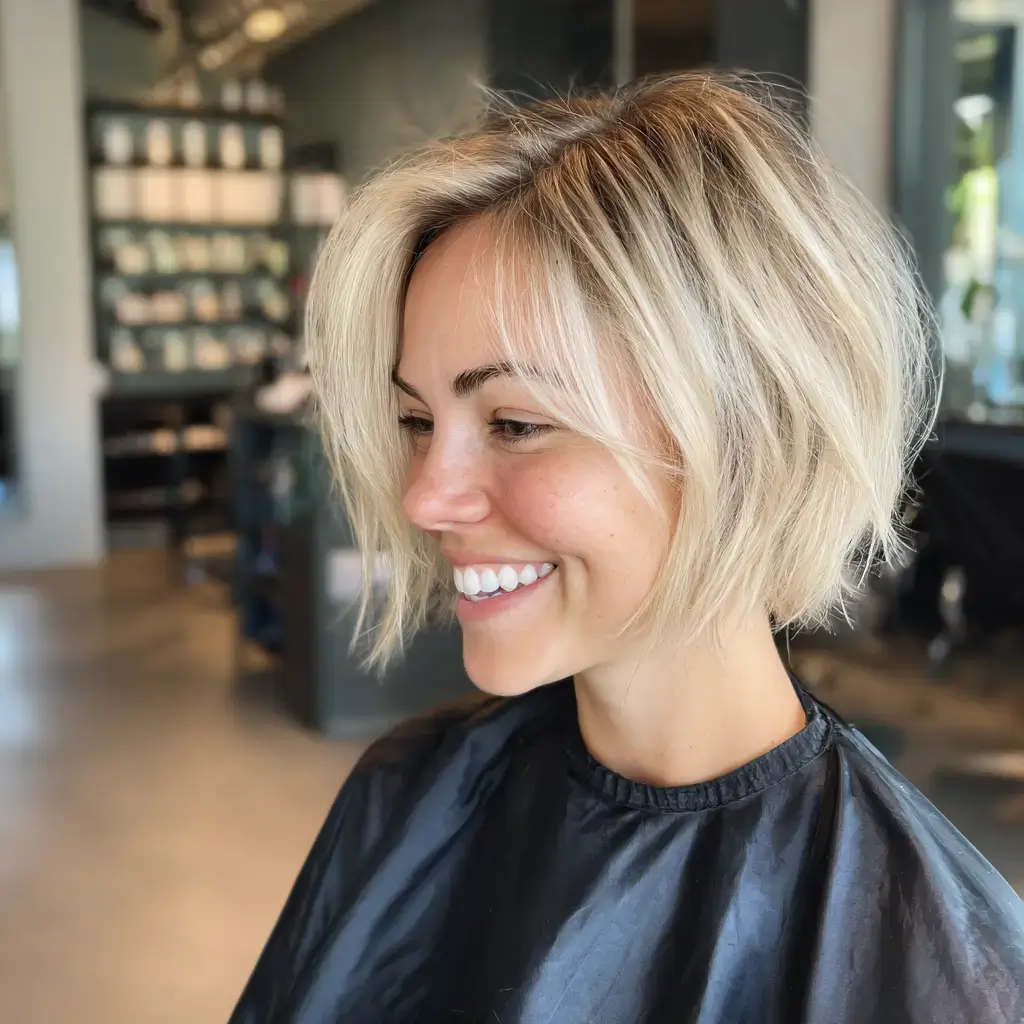
I taper the dry nape, graduate to the occipital, angle the front to the earlobe, then put a level six demi at the root and leave the lengths at level nine. On a blonde pixie bob, the shadow root holds depth at the crown while the front stays bright. Fine to medium density with 1A to 2B texture is the fit. Dry it with a round brush. Trim every five weeks; refresh the root every ten.
20. Pixie Bob Cut for Straight Hair
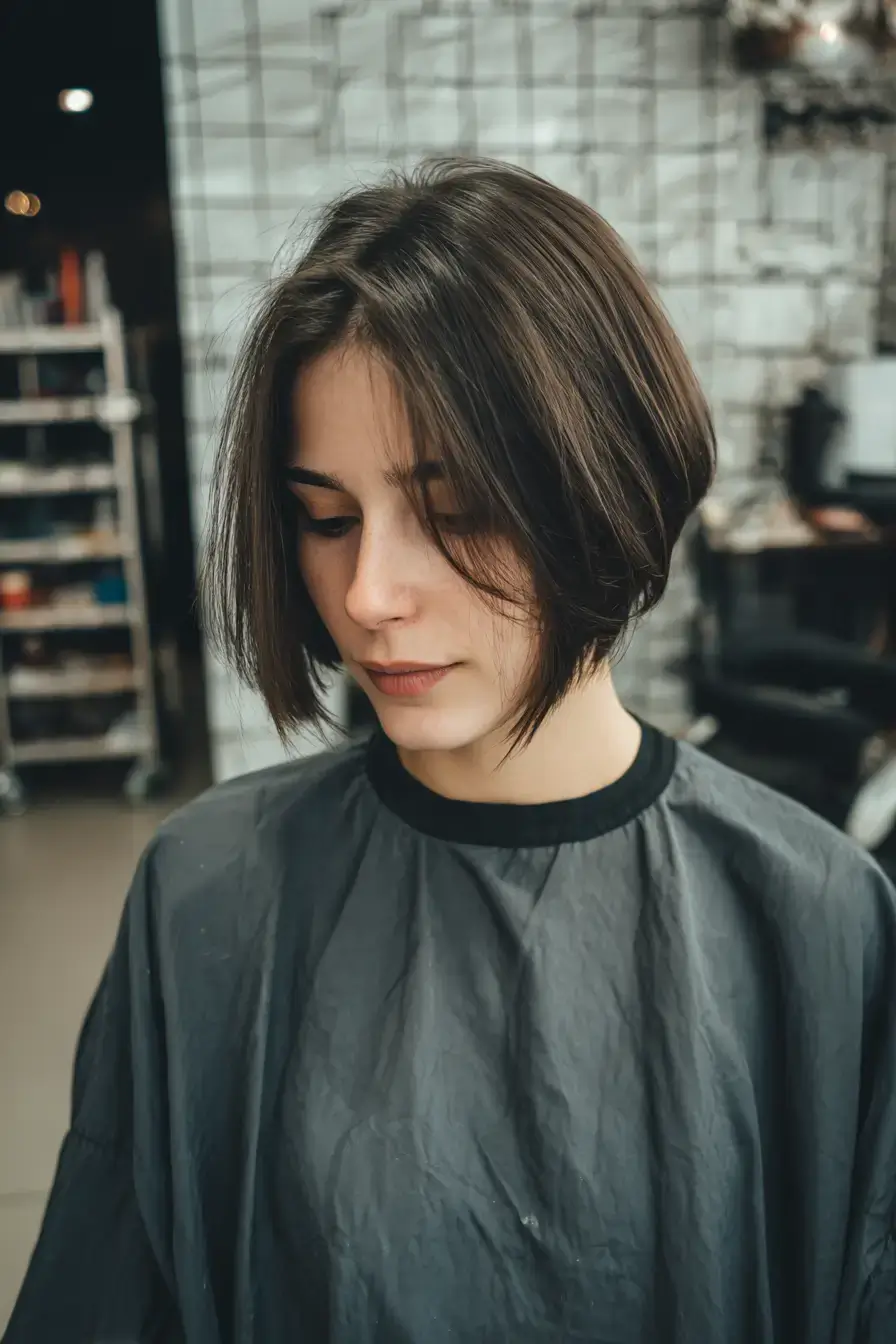
I clipper the dry nape, graduate in quarter-inch increments, and angle the front to the earlobe holding the shears flat. Straight hair shows every line of graduation in a pixie bob, so the cut needs to be clean. Fine to medium density and 1A to 1C texture fit oval and square faces. Dry it flat with a paddle brush and turn the front under with a flat iron. Trim every five weeks.
21. Pixie Bob in Dark Brunette
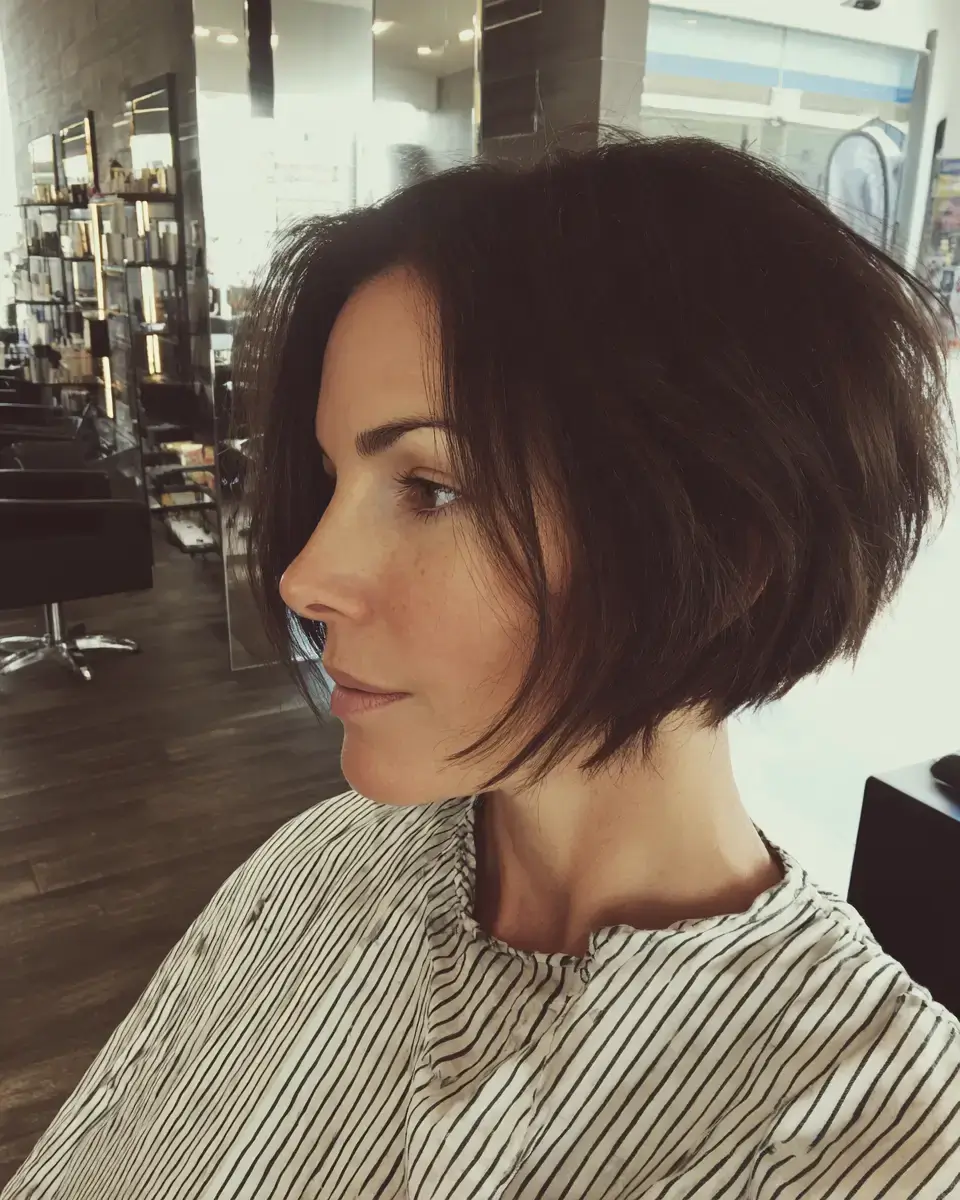
I taper the dry nape, graduate to the occipital, angle the front to the earlobe, and apply a level four demi from root to end. Dark brunette makes the curve of a pixie bob’s graduation look sharp against the skin. It suits cool or neutral skin tones and fine to thick density. Use a paddle brush to dry it flat, then finish with serum. Refresh the tone every eight weeks.
22. Pixie Bob Cut With Layers
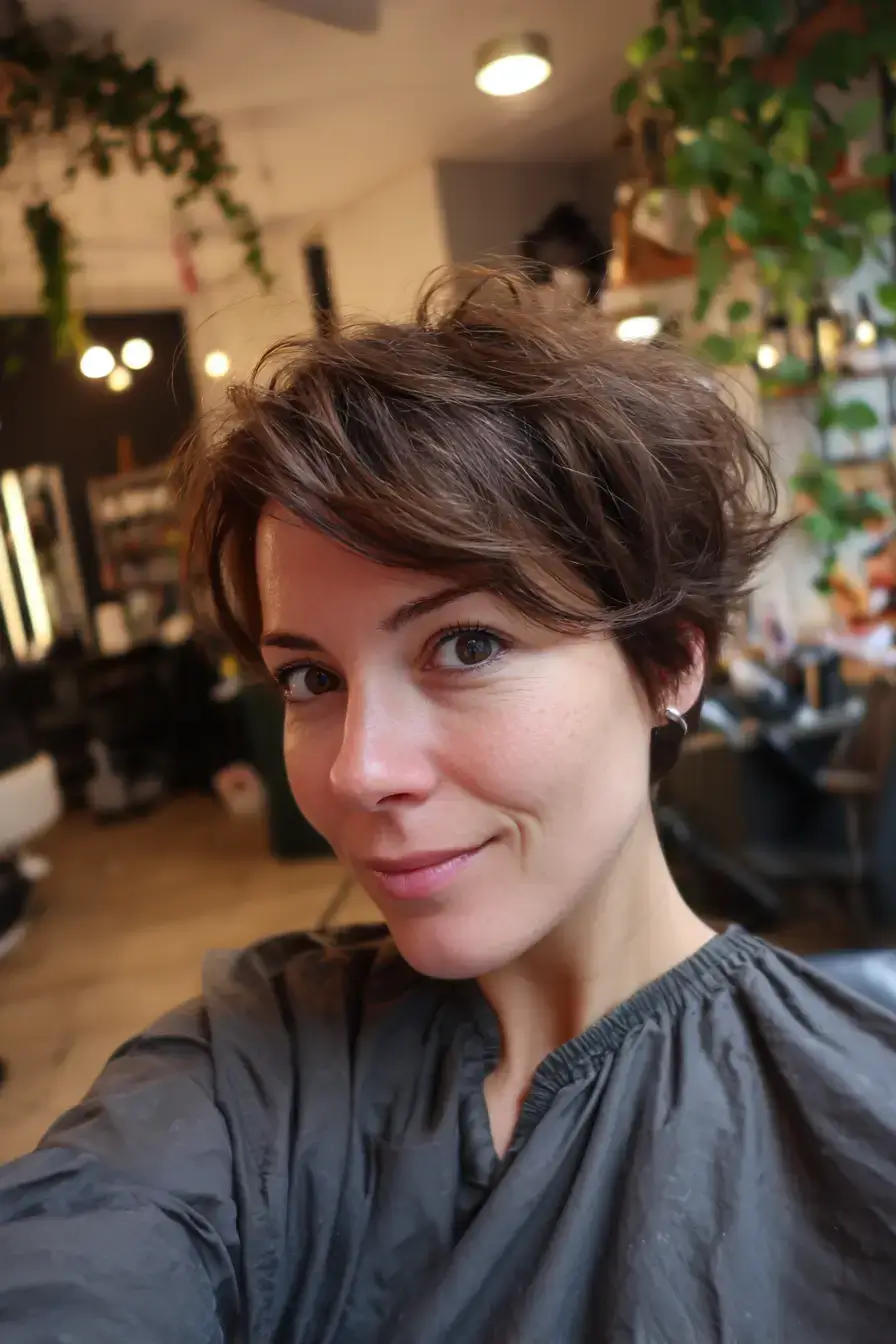
I taper the dry nape, graduate to the occipital, angle the front to the earlobe, and point cut layers from the cheekbone through the front. Those layers give the pixie bob movement at the front and leave the graduated back alone. Medium to thick density and 1A to 2B texture wear it on most face shapes. Rough-dry with volumizing spray and piece with paste. Trim every five weeks.
23. Air-Drying Pixie Bob
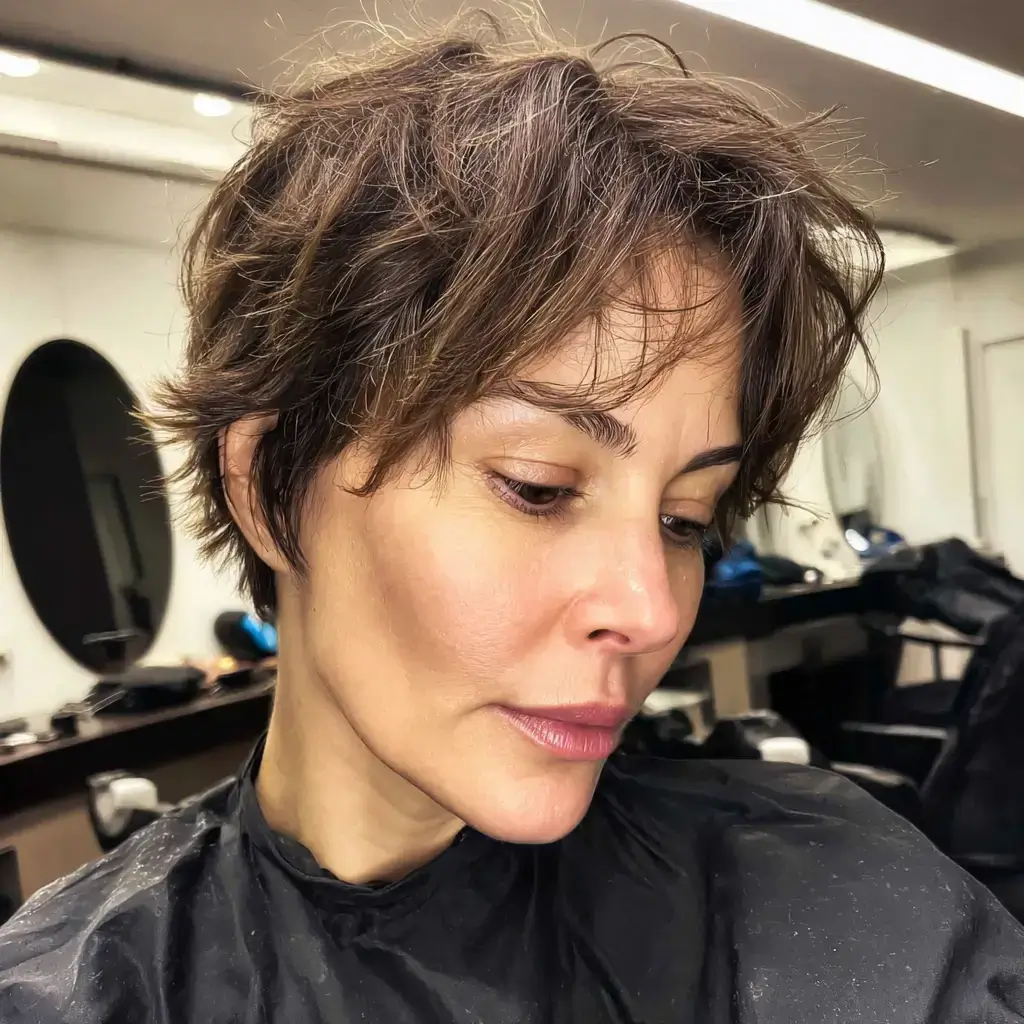
I taper the dry nape, graduate gently, angle the front to the earlobe, and point cut deep into the ends. That deep point cutting lets a pixie bob that air-dries fall into shape without a brush. Any face shape works with fine to medium density and 1C to 2B texture. Smooth a light cream into damp hair, push the front forward with your fingers, and leave it. Trim every six weeks.
24. Pixie Bob in Platinum

I clipper the dry nape, graduate to the occipital, angle the front to the earlobe, then lift to a level ten and tone violet. Platinum makes the graduation of a pixie bob very visible, so the cut must be even. It suits cool skin tones and fine to medium density. Dry it flat with a paddle brush and use a bond builder once a week. Retouch every four weeks.
25. Pixie Bob Finished With Face-Framing Pieces
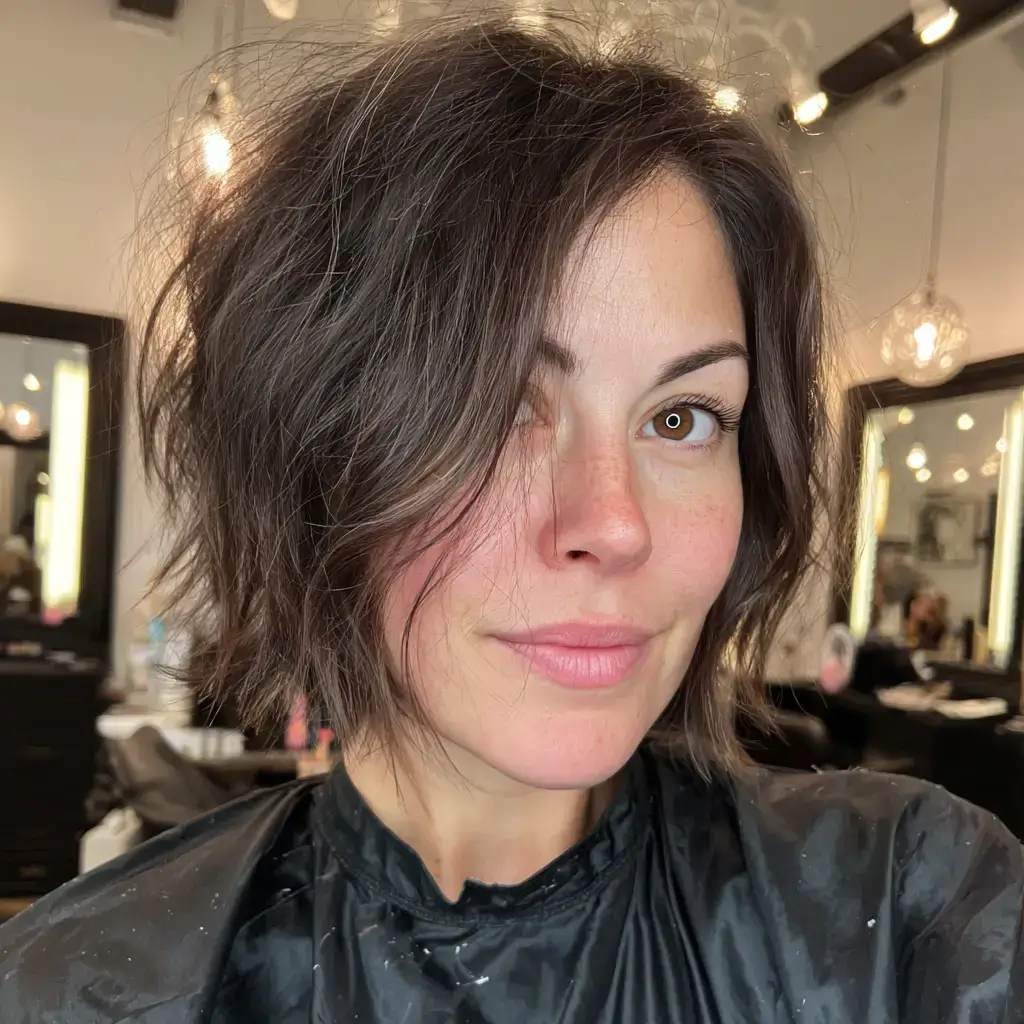
I taper the dry nape, graduate to the occipital, angle the front to the earlobe, and leave the temple pieces an inch longer before point cutting them. Those face framing pieces are the longest hair in the pixie bob and fall past the cheekbone. Fine to thick density and 1A to 2B texture suit square and round faces. Dry the pieces forward. Trim every five weeks.
Another angle: hair for rectangle face shape and long shag haircut round face.
A pixie bob reads quick because the perimeter sits at the ear and the wavy top sets where each layer falls, so it dries in about ten minutes with a round brush. It also grows out as a clean short bob.